Quick & Healthy Roasted Green Beans: Your New Favorite Side
Are you searching for that elusive side dish that’s both incredibly simple to prepare, bursting with flavor, and genuinely good for you? Look no further than roasted green beans. Forget bland, boiled beans; when these vibrant pods meet the high heat of your oven, a magical transformation occurs. They emerge tender-crisp, slightly sweet, with irresistible blistered edges, making them a game-changer for weeknight dinners and special occasions alike.
In a world often gravitating towards less healthy snack options, roasted green beans stand out as a delicious, wholesome alternative. This guide will walk you through everything you need to know to master this versatile vegetable, from basic preparation to gourmet variations, ensuring perfect results every time.
The Irresistible Allure of Roasted Green Beans
Why has roasting become the preferred method for so many when it comes to green beans? The answer lies in the unique combination of texture, flavor, and sheer convenience it offers.
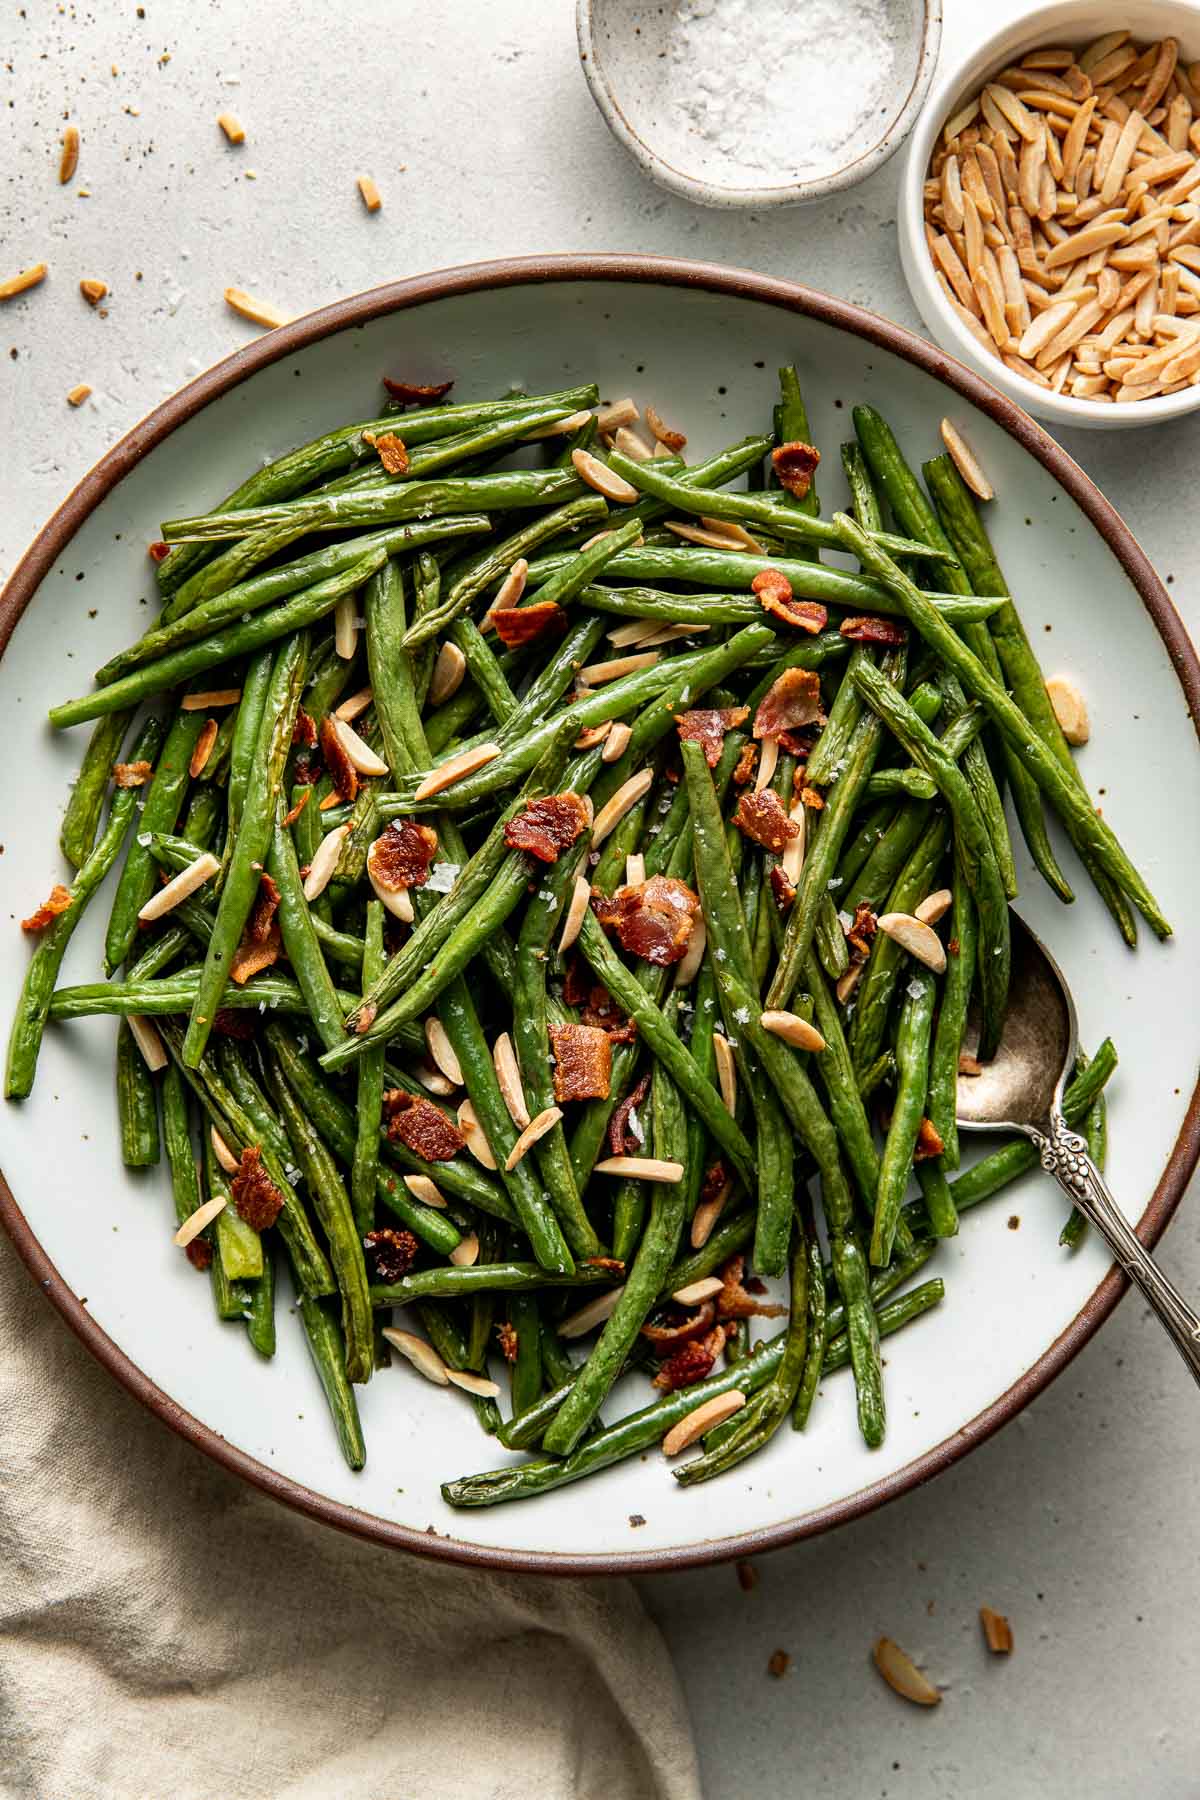
- Unmatched Texture Transformation: Unlike steaming or boiling, which can leave beans watery and limp, roasting elevates green beans to a whole new level. The dry heat caramelizes their natural sugars, creating a tender interior with delightfully crisp, slightly charred exteriors. These "blistered" spots are where much of the magic happens, delivering a depth of flavor that's simply addictive.
- Flavor Concentration: Roasting intensifies the green beans' inherent sweetness and earthy notes. The high heat coaxes out their best qualities, making them incredibly savory and satisfying, even with minimal seasoning.
- Speed & Simplicity: In a mere 10-25 minutes, you can have a gourmet-quality side dish on the table. This makes oven roasted green beans an ideal candidate for busy weeknights when time is precious but you don't want to compromise on healthy eating.
- Nutritional Powerhouse: Green beans are packed with vitamins (K, C, A), fiber, and antioxidants, all while being low in calories. Roasting preserves many of these nutrients, offering a guilt-free way to boost your vegetable intake. They make an excellent, healthier swap for carb-heavy sides, providing a satisfying crunch that can even rival fries!
Mastering the Art of Perfectly Roasted Green Beans
Achieving perfectly roasted green beans isn't complicated, but a few key techniques can make all the difference. Follow these steps for consistently delicious results.
Picking Your Pods: Quality Matters
The foundation of any great dish starts with quality ingredients. When selecting fresh green beans, look for:
- Brightness: They should be a vibrant green, not dull or faded.
- Firmness: Gently bend a bean; it should snap crisply, indicating freshness and hydration. Avoid limp or rubbery beans.
- Smoothness: The pods should be smooth and unblemished, free from dark spots or soft areas.
While fresh is always best, you can also roast frozen green beans in a pinch. Just be sure to thaw them completely and pat them thoroughly dry before tossing with oil and seasonings. Excess moisture will lead to steaming rather than roasting, preventing those coveted crispy edges.
Preparation: Trim, Toss, & Single Layer
Proper preparation is crucial for even cooking and optimal texture.
- Trim the Ends: Line up your green beans on a cutting board, aligning the stem ends. Use a sharp knife to slice off the tough, stringy ends. You can leave the beans whole for an elegant presentation or cut them into two or three pieces if you prefer smaller bites.
- The Olive Oil Embrace: Drizzle your trimmed beans generously with good quality olive oil. Olive oil not only adds flavor but acts as a heat conductor, ensuring even cooking and promoting that beautiful caramelization. Toss them well to ensure every bean is lightly coated.
- Basic Seasoning: A simple sprinkle of salt and freshly ground black pepper is often all you need. These basic seasonings allow the natural flavor of the beans to shine. For a super quick and tasty side, check out our guide on Easy Roasted Green Beans: Crispy Side Dish in Under 20 Minutes.
- The Single Layer Secret: This is arguably the most critical step. Spread your seasoned green beans onto a baking sheet in a single layer. Overcrowding the pan will cause the beans to steam instead of roast, resulting in a soggy, rather than crispy, texture. If you have a large batch, use two baking sheets.
The Roasting Revelation: High Heat for High Flavor
The magic of roasted green beans truly happens in the oven.
- Preheat Power: Always preheat your oven to a high temperature, typically between 400°F and 425°F. This intense heat is what quickly cooks the beans and creates those desirable blistered, tender-crisp results.
- Optimal Timing: Roast for 10 to 25 minutes, depending on your oven and desired level of doneness. Begin checking around the 10-minute mark. You want the beans to be tender when pierced with a fork, slightly shriveled, and showing some caramelized or lightly charred spots. These dark, crispy bits are packed with flavor!
- The Maillard Reaction: The high temperature facilitates the Maillard reaction – a chemical process responsible for the browning and delicious flavor development in many cooked foods. This is why roasted vegetables taste so much richer than their steamed counterparts.
Elevating Your Roasted Green Beans: Flavor Variations
While simple salt and pepper roasted green beans are fantastic, the beauty of this dish lies in its adaptability. Once you've mastered the basic technique, the possibilities for flavor enhancements are endless. This is where you can truly make this side dish your own, transforming it from simple to gourmet. Dive deeper into creative add-ins with our article on Mastering Roasted Green Beans: Simple to Gourmet Side Dishes.
Garlic Infusion: A Classic Upgrade
Garlic and green beans are a match made in culinary heaven. For irresistible garlic roasted green beans:
- Initial Addition: Toss minced garlic with the beans and olive oil before roasting. Be mindful that garlic can burn easily at high temperatures. If you're concerned, you can add it halfway through the roasting process.
- Post-Roast Punch: For a fresher, more potent garlic flavor, toss hot roasted green beans with freshly minced garlic and a drizzle of olive oil, then return to the oven for just 2-3 minutes to gently soften the garlic without burning it.
Umami & Zest Boosters
Beyond garlic, numerous ingredients can elevate your beans:
- Parmesan Cheese: For a savory, nutty, and slightly salty kick, toss the beans with grated Parmesan cheese during the last 5-7 minutes of roasting. The cheese will melt and crisp up beautifully.
- Capers: Add a tablespoon or two of drained capers along with the garlic for a briny, tangy counterpoint that cuts through the richness.
- Fresh Herbs: Toss with chopped fresh dill, parsley, thyme, or rosemary after roasting. The residual heat will gently wilt the herbs, releasing their aromatic oils.
- Lemon Zest & Juice: A finishing squeeze of fresh lemon juice and a sprinkle of zest after roasting brightens the entire dish, adding a lovely citrusy zing.
- Balsamic Glaze: Drizzle a reduction of balsamic vinegar over the hot beans for a sweet, tangy, and sophisticated finish.
- Red Pepper Flakes: For those who love a bit of heat, a pinch of red pepper flakes tossed with the beans before roasting adds a subtle warmth.
Serving, Storing, and Troubleshooting Your Roasted Green Beans
Versatile Serving Suggestions
Roasted green beans are incredibly versatile and pair well with almost any meal:
- Classic Side Dish: They're the perfect companion to roast chicken, grilled fish, steak, pork chops, or even a simple burger.
- Vegetarian Mains: Serve alongside quinoa bowls, lentil soup, or a hearty vegetable lasagna.
- Appetizer or Snack: Offer them as a healthy appetizer with a dipping sauce, or enjoy them simply as a satisfying, crunchy snack.
- Salad Booster: Add cooled roasted green beans to your favorite salad for extra texture and flavor.
Storage & Reheating Tips
Have leftovers? No problem!
- Cool & Refrigerate: Allow the roasted green beans to cool completely to room temperature. Transfer them to a shallow, airtight container and refrigerate for up to four days.
- Reheating for Crispness: For the best texture, reheat in a preheated oven (around 350°F) or an air fryer until warmed through and re-crisped, about 5-10 minutes. This method helps maintain their tender-crisp quality.
- Quick Reheat: You can also reheat them in the microwave, though they may lose some of their crispness.
Common Questions & Troubleshooting
Even with a simple recipe, questions can arise. Here are solutions to common issues:
- Why are my roasted green beans soggy?
- Overcrowding: The most common culprit. Ensure they are in a single layer with space between them.
- Too Low Temperature: The oven wasn't hot enough to achieve proper roasting.
- Excess Moisture: If using frozen beans, ensure they are thoroughly thawed and patted dry.
- Why did my green beans burn?
- Too High Temperature or Too Long: While high heat is good, excessively high temperatures or prolonged cooking can lead to burning. Keep an eye on them, especially during the last few minutes.
- Uneven Heating: Some ovens have hot spots. Rotate your baking sheet halfway through cooking.
- Can I use frozen green beans?
- Yes, but thaw them completely and, most importantly, pat them bone dry with paper towels. Any residual moisture will steam the beans rather than roast them, preventing crispiness.
From their vibrant color to their satisfying crunch and savory depth, roasted green beans are a testament to how simple ingredients, when cooked correctly, can yield extraordinary results. They're quick, healthy, incredibly versatile, and consistently a crowd-pleaser. So, the next time you're wondering what side to serve, remember this guide and transform fresh green beans into your new favorite, irresistible dish.
